I was thinking a bit tonight on period looms. We all want to go to a demo and use a period loom and wear our historic clothing and really look the part. Like we just stepped out of a medieval illustration.
In the SCA and in our modern lives, however, we often have to make concessions for budget, availability, accessibility, and ergonomics. I have usually done all my weaving on an inkle loom, which, to be frank, is a 19th century invention. However, I find it much more easy to work on, transport, maintain tension on my work, and most importantly, not hurt my back.
I have made a few other looms to weave on and have experimented with weaving on them with varying degrees of success.
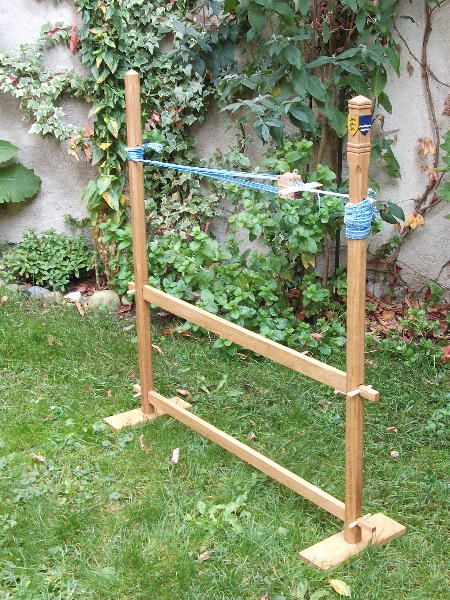
The biggest one I made was this warp-weighted loom that I created using scraps from the garage. I based it on a number of drawings from books like Marta Hoffman’s “The Warp Weighted Loom” and several historic images.

Overall, it worked well, although I did decide that it could be a little bit shorter to better accommodate my height (or lack thereof). The weights were just bags of gravel, the yarn was wool, and the selvedge edge (across the top) was a woven piece with long wefts that became the warps of the project. I was able to weave a little bit on it, but it required standing and a fair amount of wall space. As this was a prototype and an experiment, I ended up packing it away and it’s living in the garage at the moment. I didn’t do any tablet weaving on it, however, and it seemed like much more tool than necessary for a narrow band. I have read about people doing the fabric weaving and using tablet weaving as part of the side selvedges, but this wasn’t included in my experiment.
Many people LOVE backstrap weaving, but I have tried it several times with NO success. It is ergonomically challenging and always ends in back pain for me. I did see this option of using two fixed points to weave, but this is also difficult to do in a place like a hotel lobby…
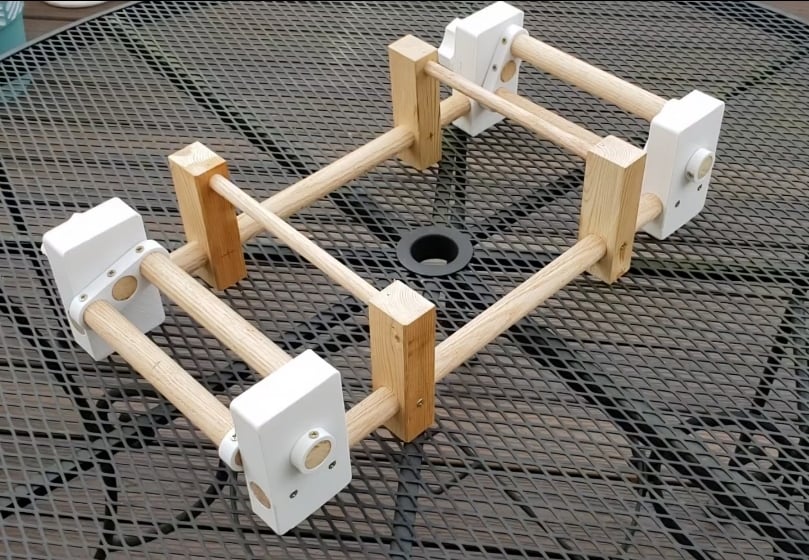
Looking to make something more portable, and easy to manufacture in bulk to teach a class, my friend and I made a bunch of “surfboard” looms. It was 1 x 4 lumber, a couple small blocks and some long screws and nuts (although this prototype has hex nuts, we swapped them out for wing nuts as they were easier to tighten by hand). It worked…mostly… There were some tension issues, but overall it was a workable loom for a class…but still not very period.
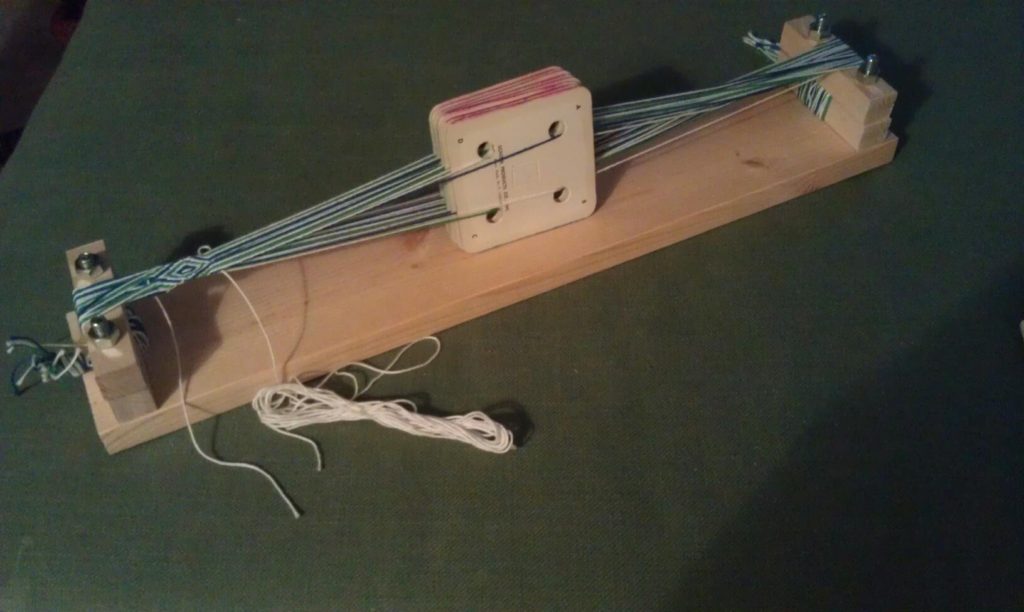
The next couple of experiments were rigid heddle and I didn’t do much with them as I was struggling with the tensioning systems…but then I tried making a 3D printed loom. Hubby has a printer and I thought it would be fun to try making it. After making several modifications from the original rigid heddle loom, I created this simple frame loom. In the end, very few parts were 3D printed–just the corner pieces and the ratchet and pawl assembly, which didn’t work quite as well as I needed–the pawl keeps popping out under tension. I did weave a couple pieces on it and it worked OK. It was a fun experiment, at least!
This is similar (at least in method) to the box looms of the later Middle Ages, like this image: La Noble Pastorale from c 1500. It is rather hard to see what’s going on here (blurry), but it’s clearly meant for narrow band weaving. It is more box-like, not a frame.

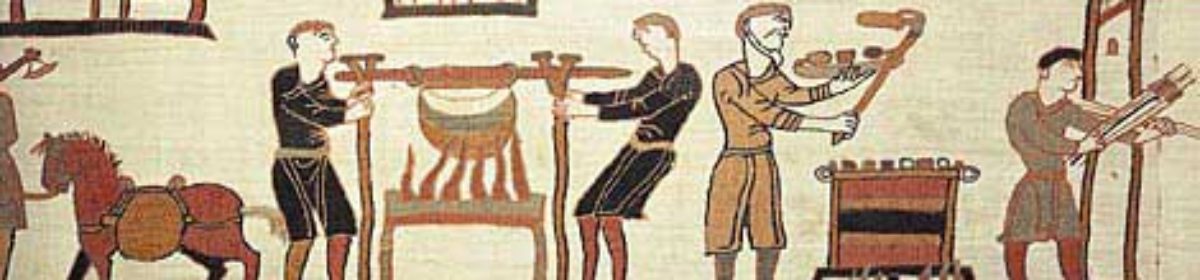
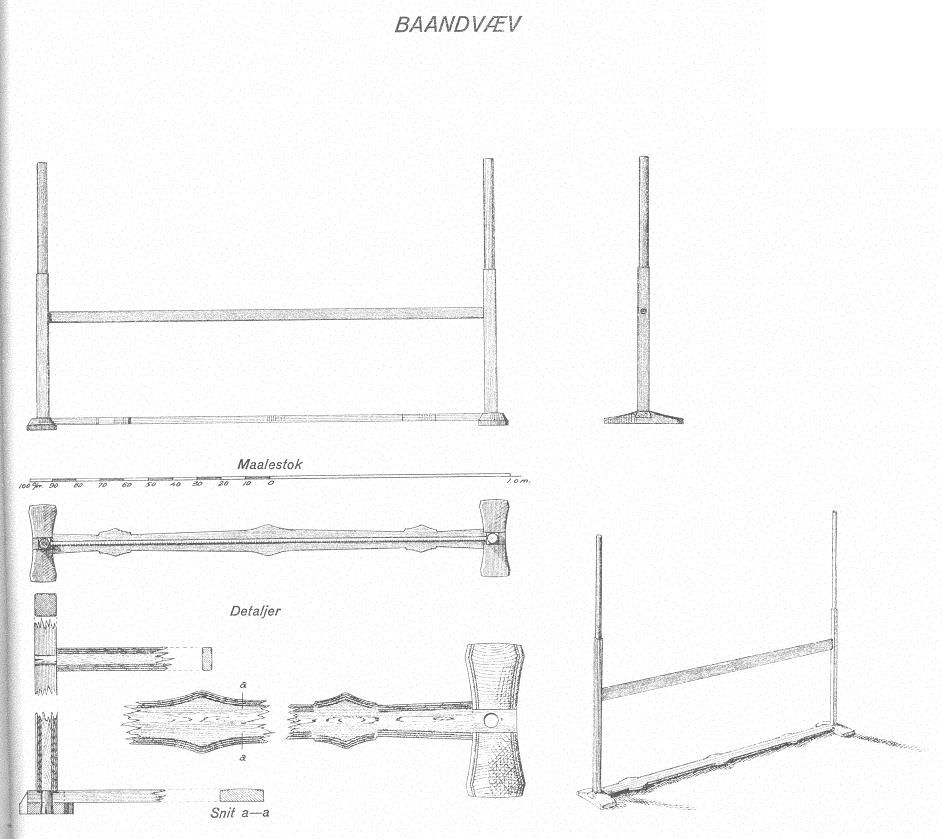
The next collection of looms are based on this pile of sticks–the Oseberg loom.

This remarkable find from the Oseberg farm in Norway dates to the 9th century which includes an unfinished piece of weaving with a whole bunch of cards. This is an upright loom that looks something like this:
I love this modified loom design because it looks like it breaks down for easy transport! This is ideal for demo purposes and small vehicles.
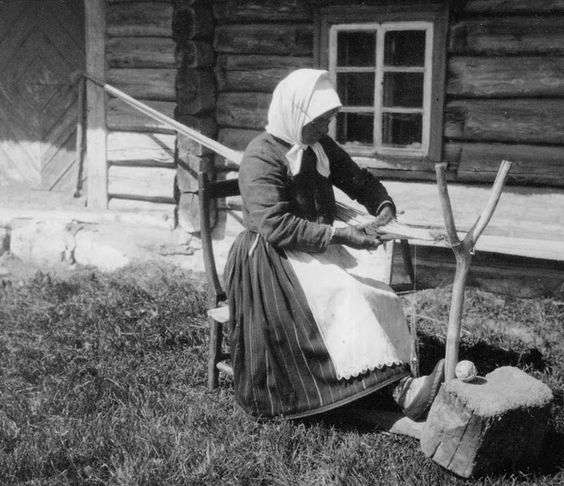
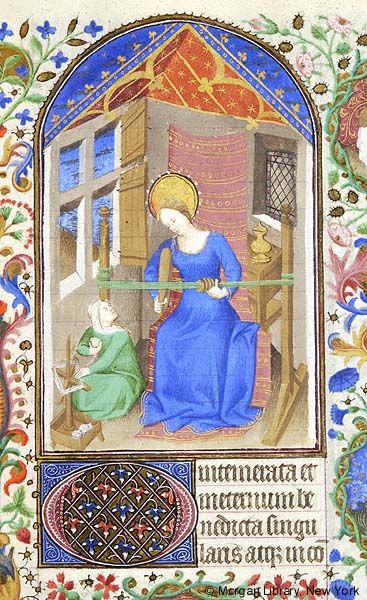
Also, there are a number of medieval images of women using similar set ups for weaving, like this one:
The plans for this loom were found on Pinterest, also.
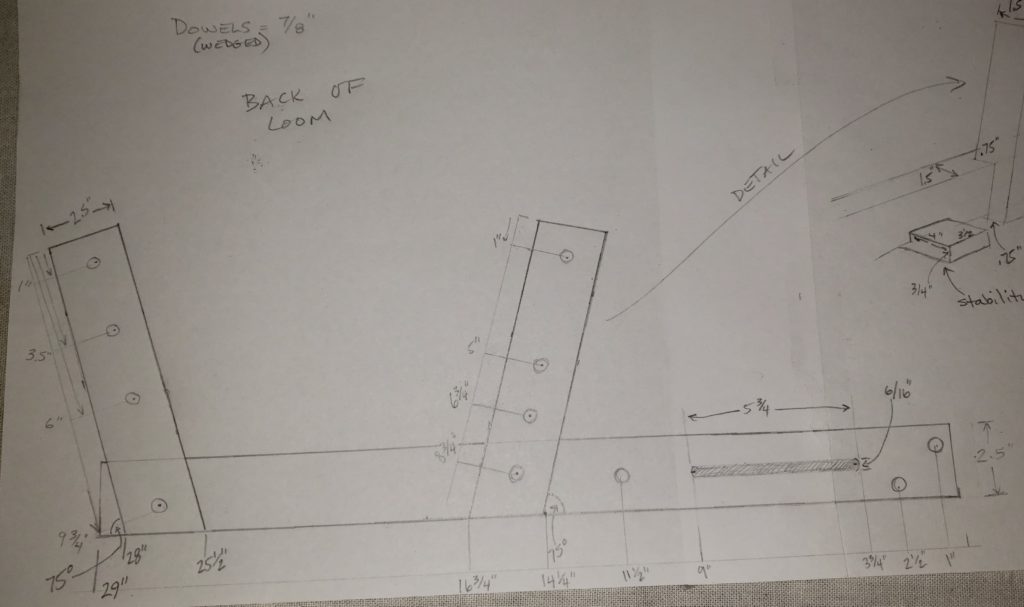
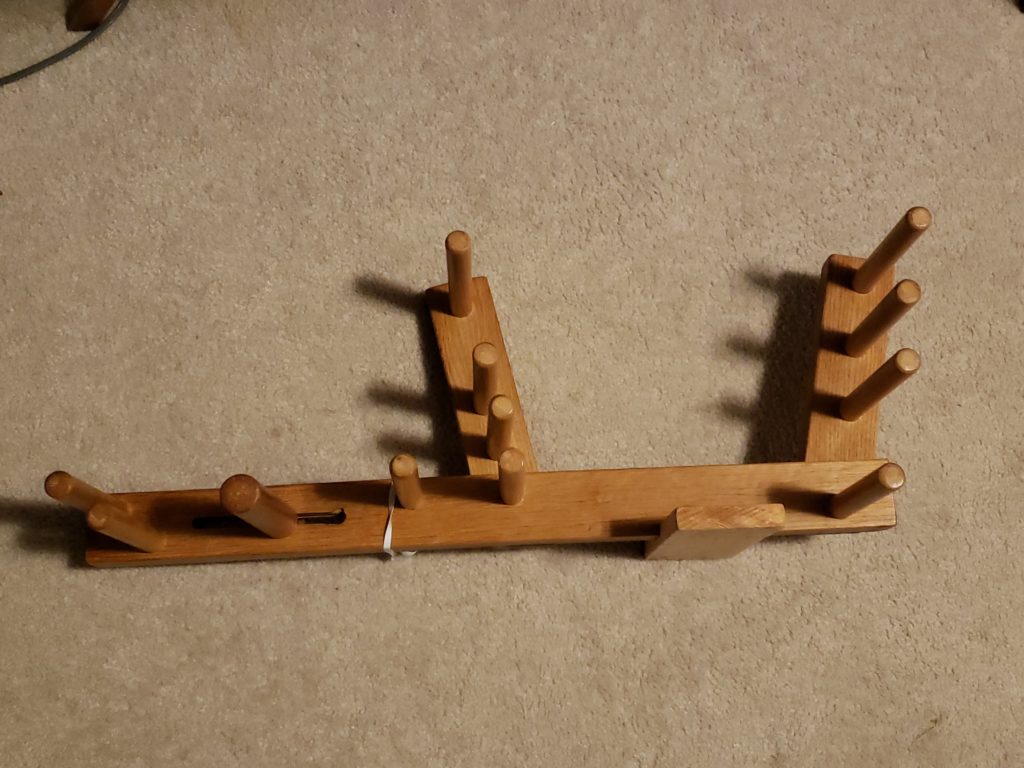
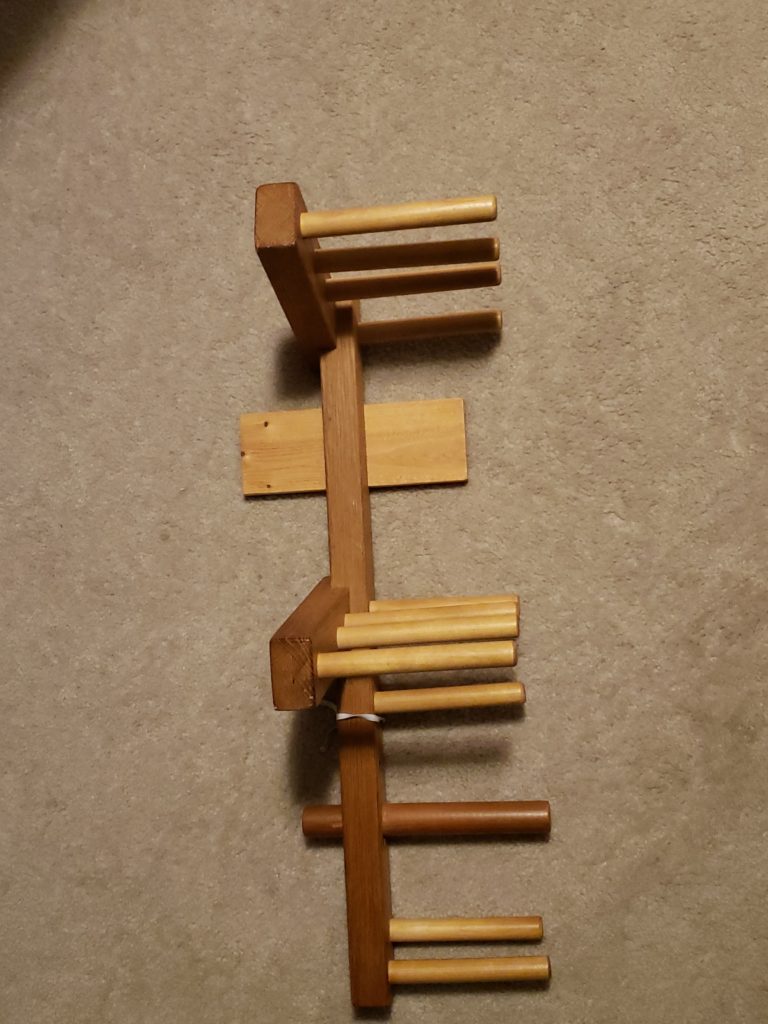
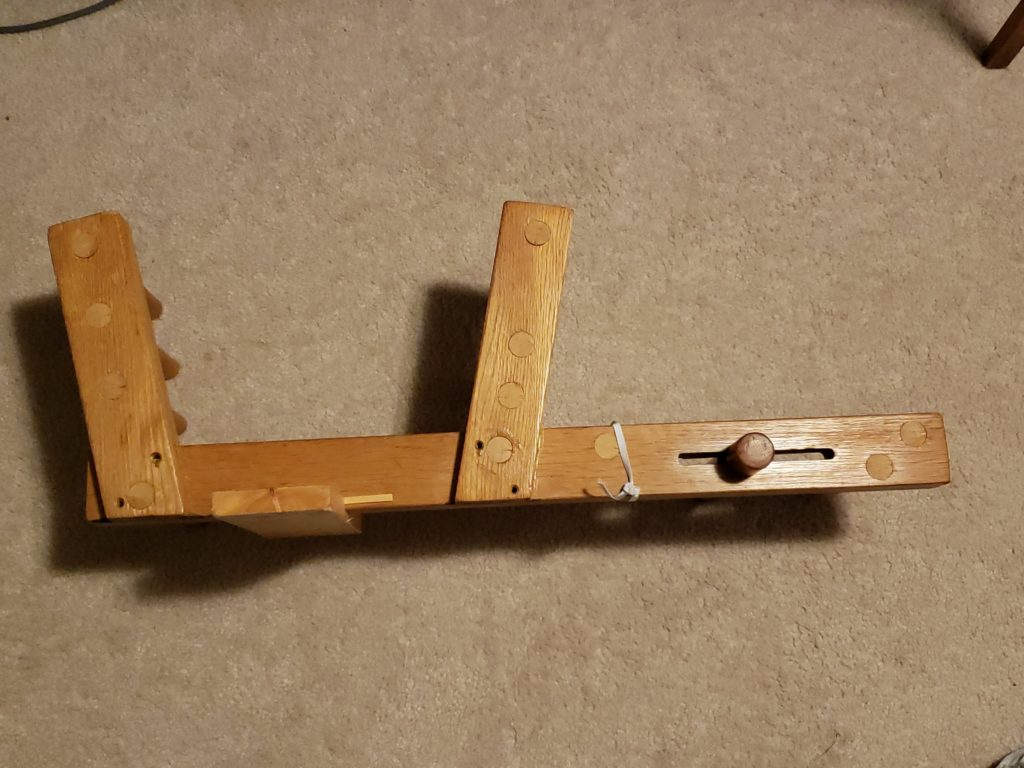
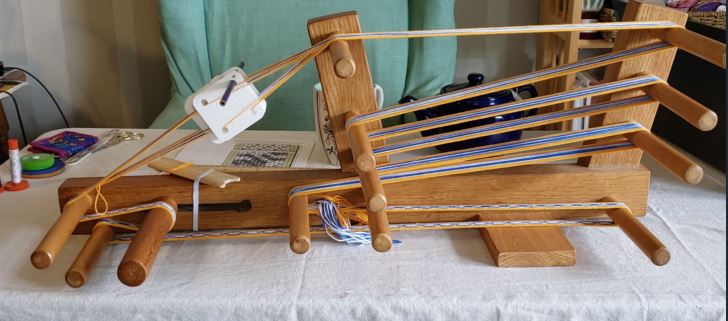
I took a class many years ago (in the 90s) from Master Fiacha, also a tablet weaver in An Tir, and he created these portable Oseberg-style table looms. It is a simple 2 x 4 and a couple dowels, and requires a clamp to hold it on the table, but it is a fairly usable tool.
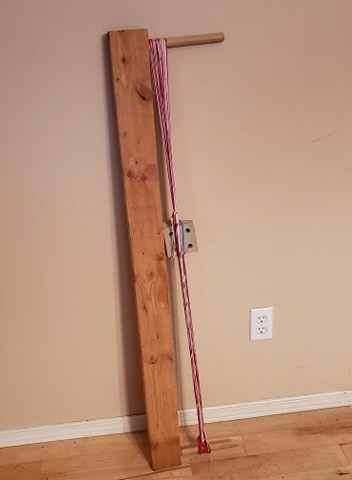
It was rather LONG, however, so I thought I’d try to create a more portable size using the original loom as inspiration.
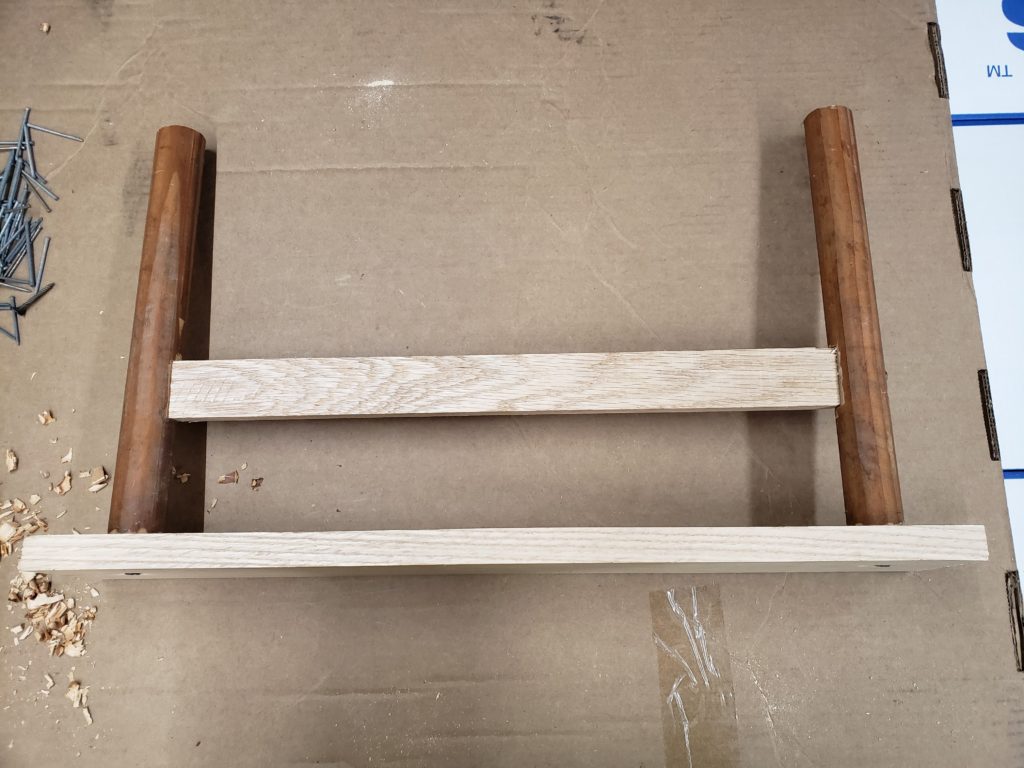
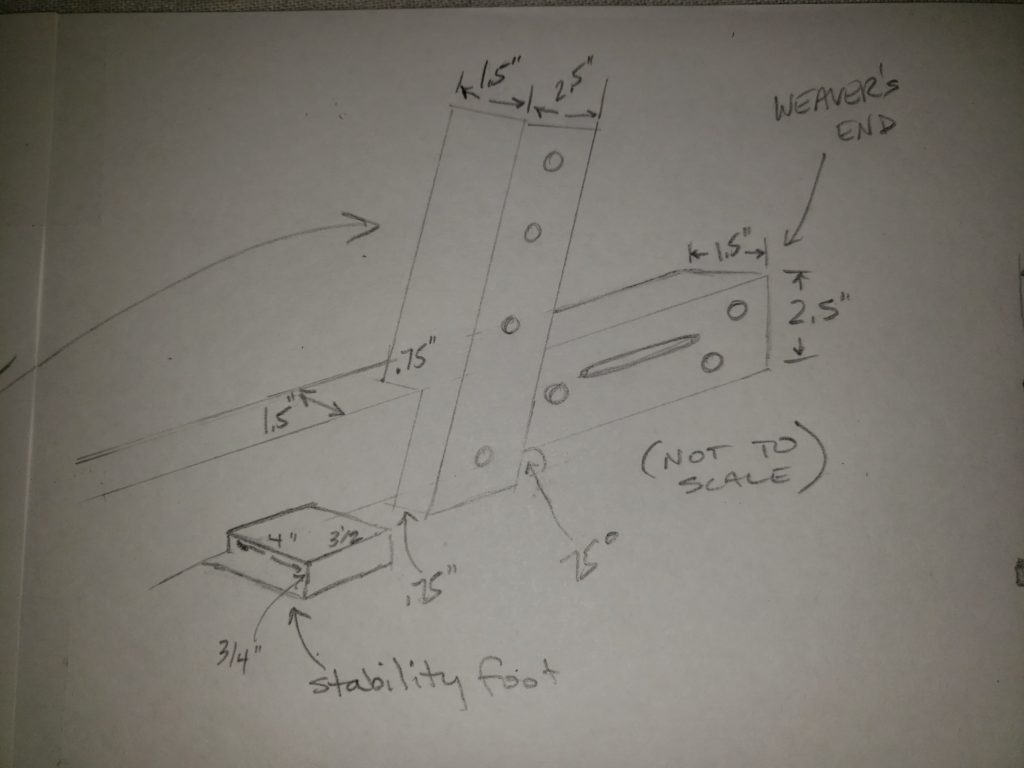
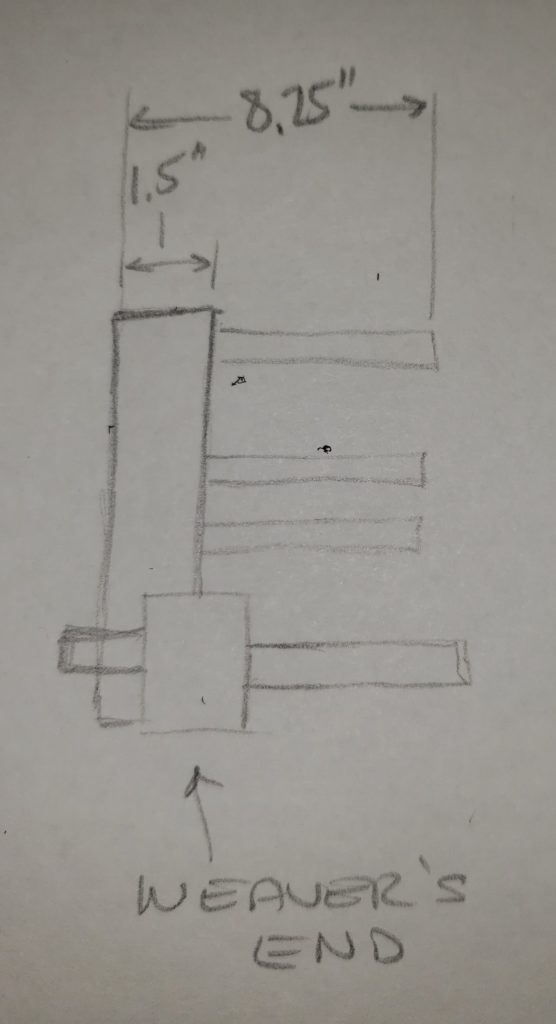
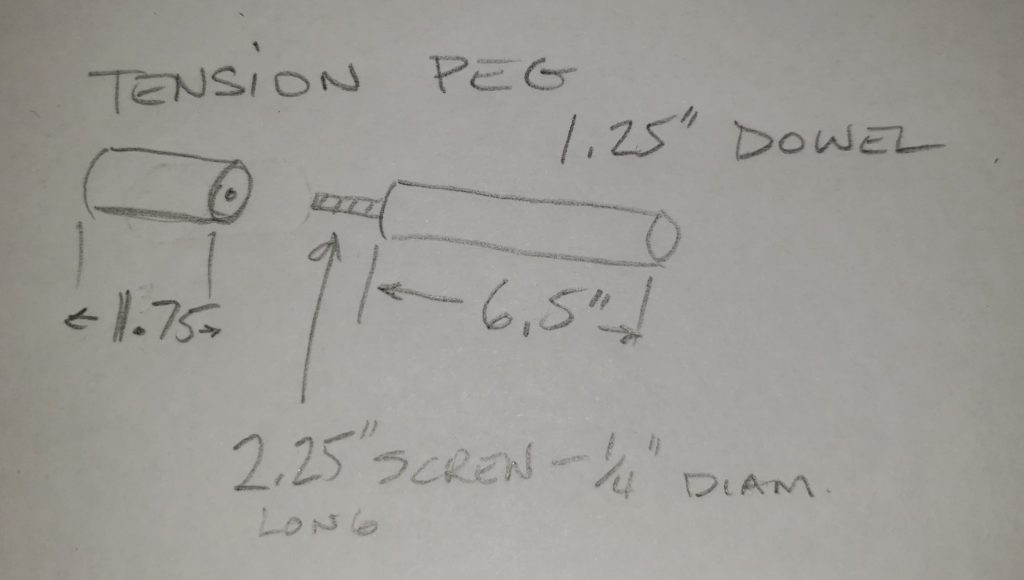
With just a couple of pieces of dimensional lumber, a couple of dowels, and 4 screws, this little loom went together quickly. It stands just over a foot tall and about 18″ long. It fits easily into a carry on bag, ready to fly off to exotic locales for vacation weaving!
I loaded up a project on it and worked it for a while, getting used to the angle and the wobbly nature of the cards as I worked. It was different, but not unmanageable.

So for future demos, I will be bringing the little Oseberg table loom with me to work on projects. It’s small and portable and fun to work on!
Elewys