My creative SCA journey on stuff I make and research I do…mostly in fibers (wool prep, spinning, weaving, tablet weaving) and glass beads, but could also include costumes, camping, cooking, and any other creative things that strike my fancy.
I’ve had a number of folks asking me about my loom, how it was made, where I bought it, etc. The answers are: it’s an Inkle loom–a 19th century invention (so…not medieval at all), unknown maker, and I bought it second hand more than 20 years ago. I think I bought it before I had kids…and my eldest is 23 now.
However, I am here to give you plans, dimensions, photos, and all the suggestions for improvement if I were to make it again. The discussion will be in the video, but this is where I wanted to post all the drawings (for what they’re worth–it’s been many a year since I took drafting, and I am not a proficient woodworker, so your mileage may vary).
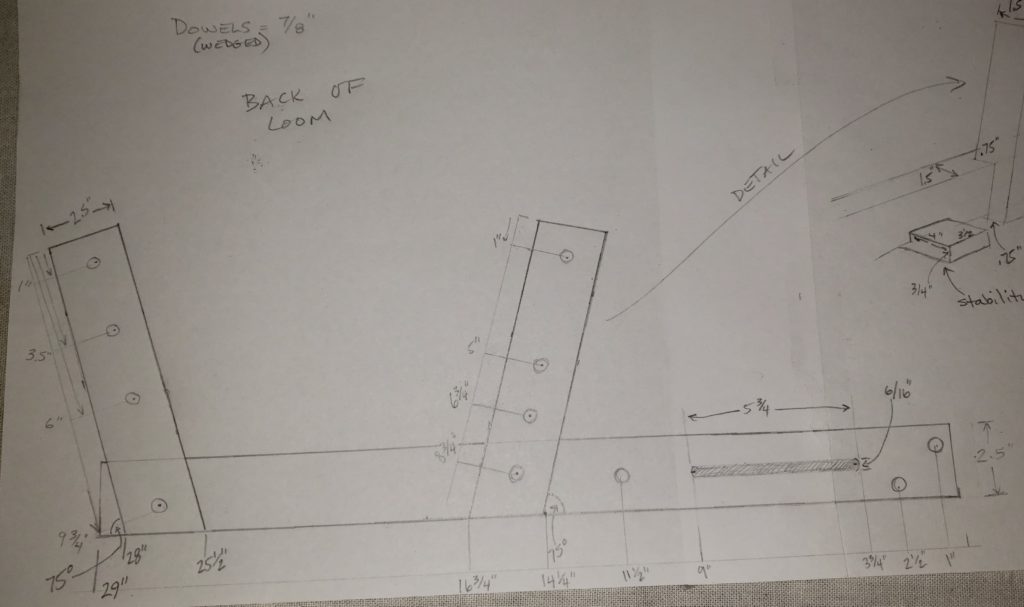
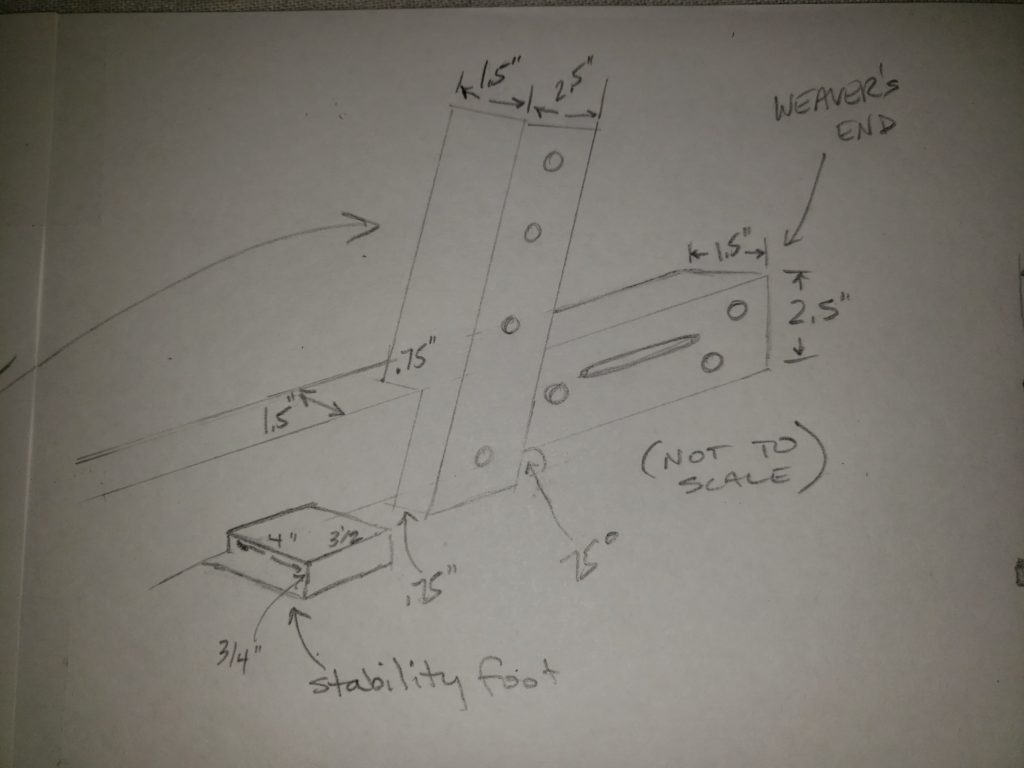
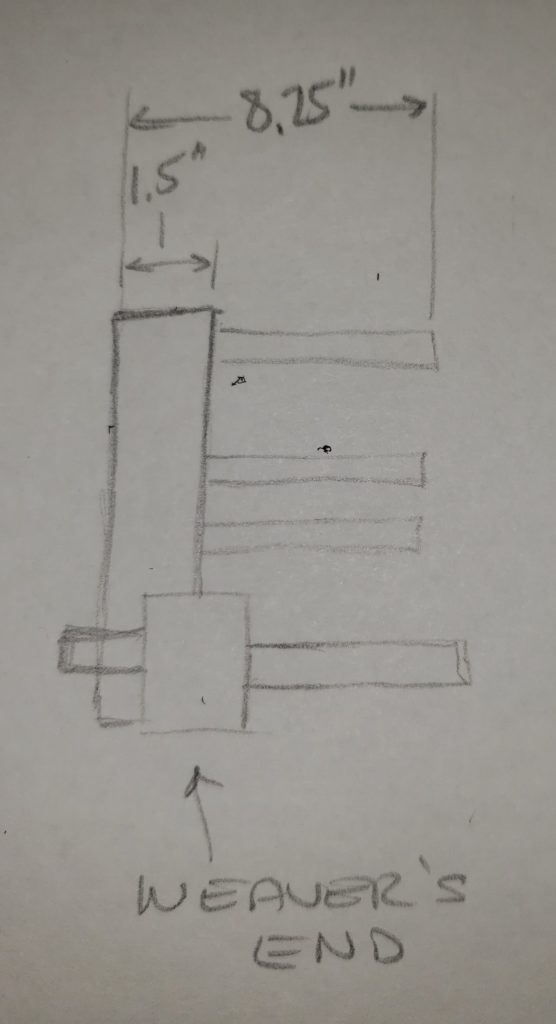
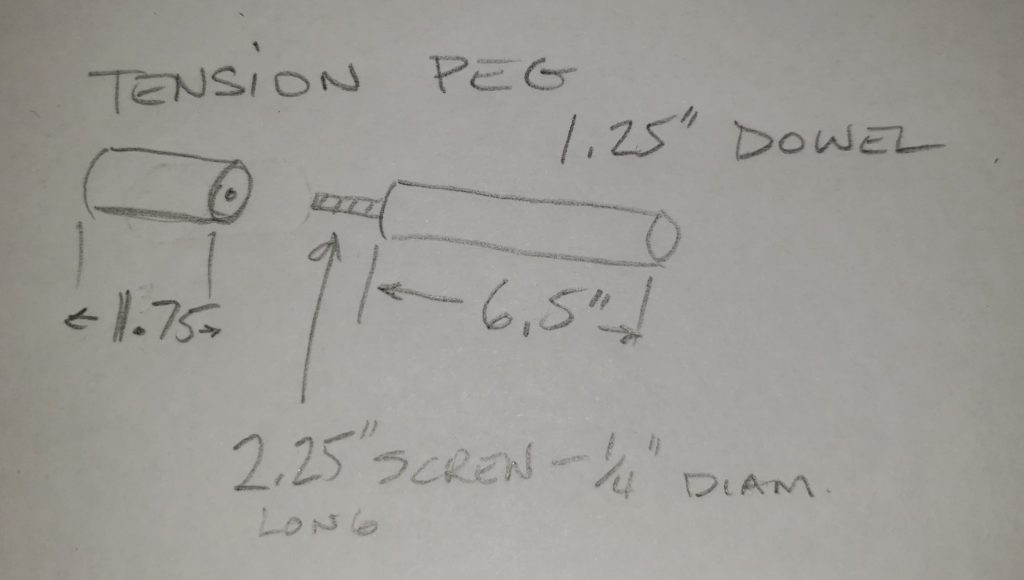
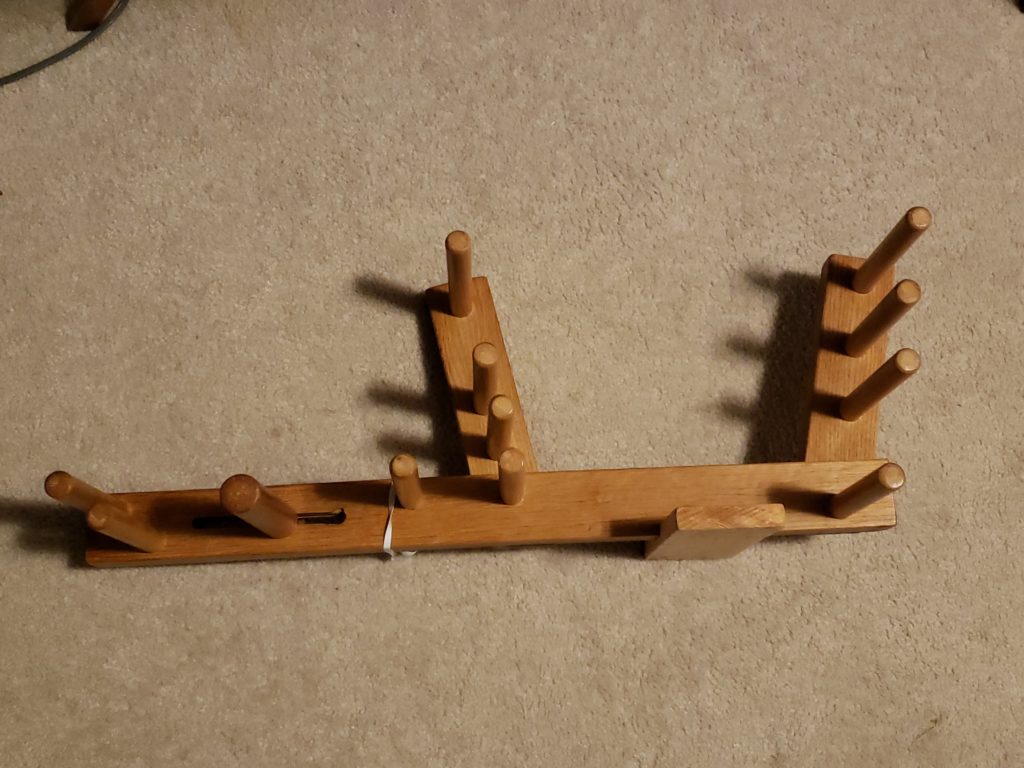
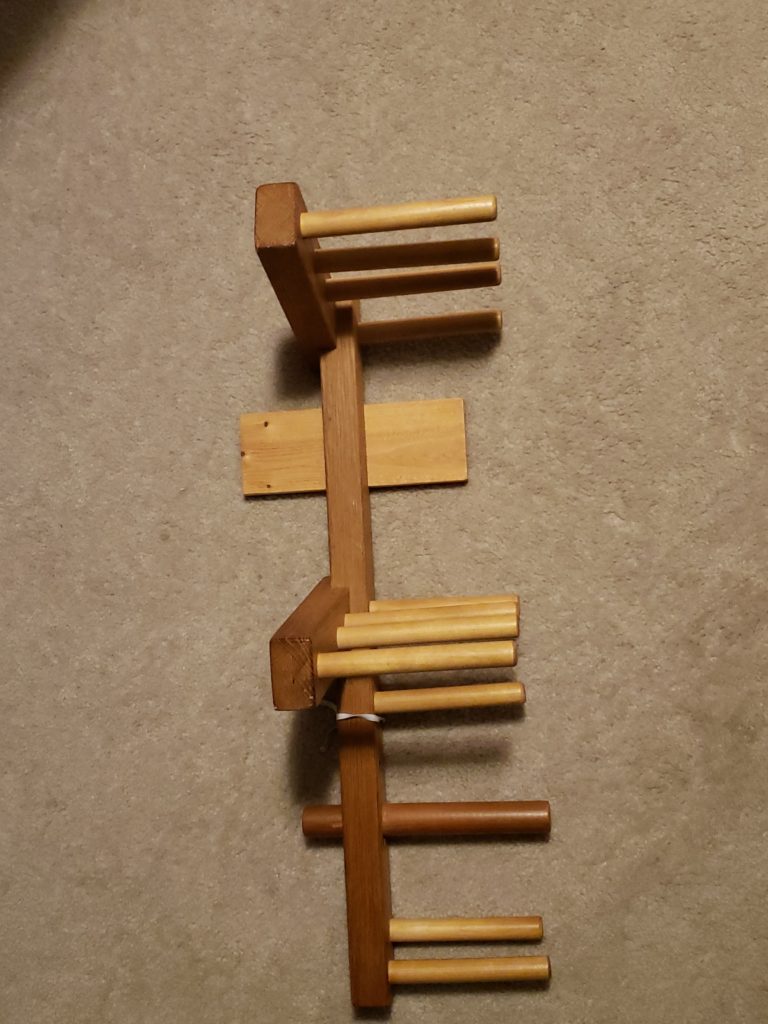
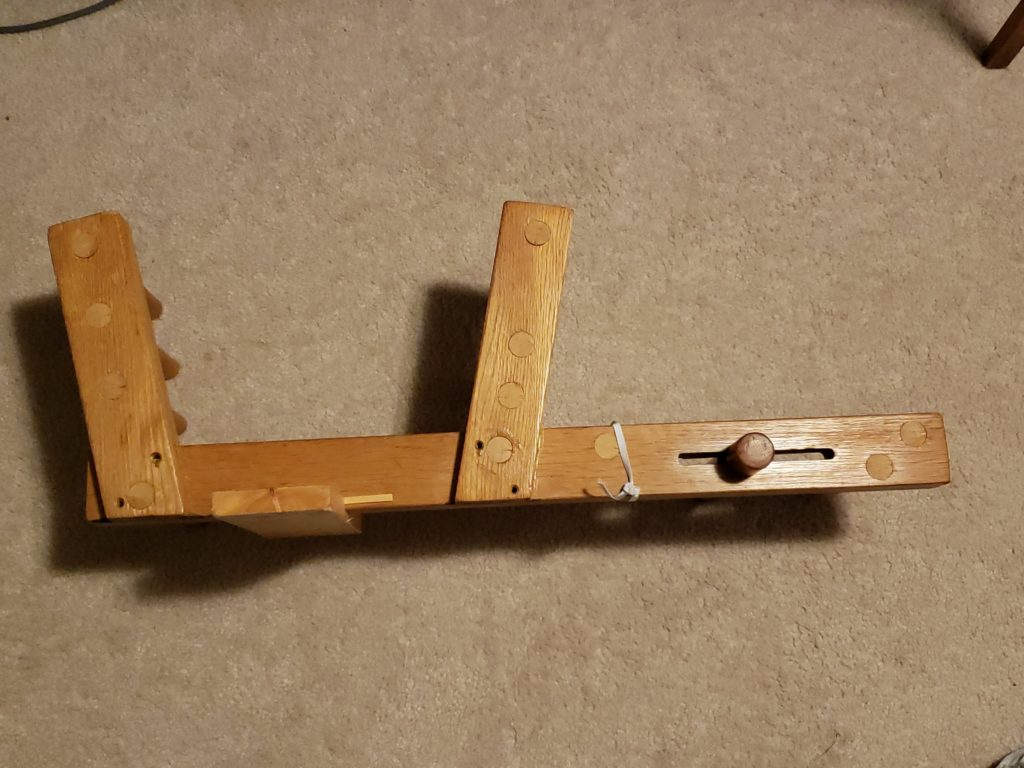
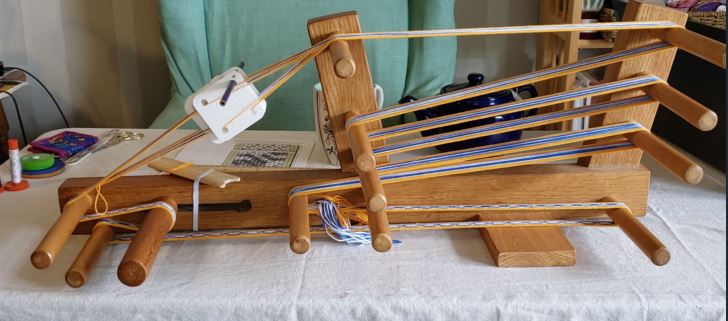
This is a view of the back of the loom. If I were to make it again, I would make the slot for the tension peg at least an inch longer–maybe two.This is a view of the forward end–the weaver’s end–but still the back view of the loom. I have omitted the tension peg in this drawing for simplicity. Note that this drawing is not to scale…I wasn’t sure how to do that at an angle, but I think it makes sense.This is the view from the forward end–the weaver’s end–of the loom. Again, not to scale, and clearly, not the best drawing ever. The pegs don’t even come close to lining up…sigh.A simple diagram of the tension peg. The threaded screw fits into the narrow slot on the base, and into the tapped end. The wooden peg pinches the base as you tighten the screw.The front of the loom. From this angle, you can see how close together the pegs are on the left (weaver’s) end and the three pegs in the middle. If you are using this exclusively as a tablet weaving loom, those pegs can be spread out further to accommodate the warping. I might also add an additional peg on the base between the right-most peg and the one to its left, just above and to the left of the stabilizing foot.Top view of the loom.The back of the loom. Note that the pegs are all wedged into place. The stability foot was added later by me, but I strongly recommend it.The end of the loom–the weaver’s end.Here’s the loom warped up–now you can see how the pegs have been placed to accommodate the weaving. The peg at the lower right is lower than the pegs in the middle of the base, and the large gap between the top peg on the first upright and its second peg leaves room for a string to go directly from the front peg to the back peg if you are using it for inkle weaving.Inkle loom, warped, for reference. Note how half of the strings go directly from the front peg to the back peg. The other half go through string heddles, then up to the top peg on the first upright, then to the back peg. If you are making your loom for only tablet weaving, you don’t need to worry about that gap.
I hope you are able to translate these images and drawings into a loom of your own!
And when you find that this little guy isn’t enough for you…