
(Originally posted 5 Dec 2014)
I’ve been watching a card weaving Facebook page and several people have asked about how to do the Ram’s Horn pattern. It’s not a beginner’s pattern, for sure, but with an understanding of how the cards are set up and turning patterns of the cards, you, too, should be able to produce a lovely woven Ram’s Horn band. Sounds easy enough, right? Don’t worry–go step by step, and you’ll have this one by the horns!
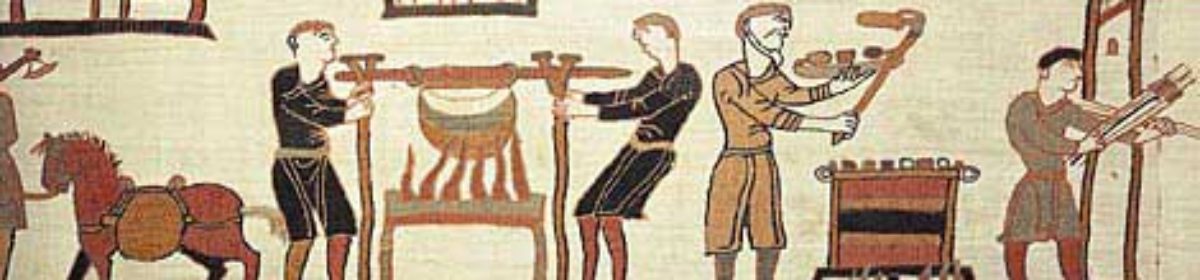
Now, it should be noted, for those who are big into the recreationist groups like the SCA, this is not a period piece. Historically, the only mention I can find is from a web site that reads: “The Ram’s Horns pattern popularlized by Crockett’s “Card Weaving” book comes from the 20th century Anatolian (Turkish) belts and it has not equivalent in archeological finds.” http://weavedmagic.deviantart.com/journal/Origins-of-most-popular-tablet-weaving-patterns-394709084
So let’s get to the full color demonstration of this pattern! READY?
If you’re not sure if you’re going to like it, or if you suspect you might get frustrated from trying and pitch it across the room, you may want to try a short piece first. Don’t warp up the loomzilla for this first project. When I first tried this pattern, I did one-yard lengths for each thread, just to test it out. I ended up getting about a foot done before I knew I needed to do a larger piece!
Supplies needed:
- 3 colors of carpet warp or crochet cotton thread–I used Maysville 8/4 Carpet Warp. It’s good stuff, heavy duty and will make great belts, bag straps, and heavy trim (it’s not delicate and as flexible as finer threads, but a great place to start).
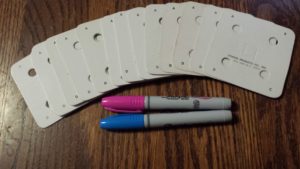
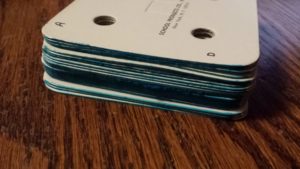
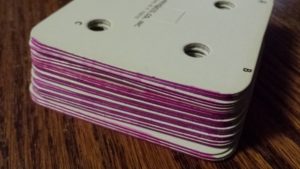
- 22 cards–mine are the store-bought 3″ cards with ABCD labeled in clockwise order. (European cards are labeled in reverse)
- 1 loom–I use an inkle loom that weaves up to 4 yards of trim, which makes it portable and if I need to run to grab the phone or pick up the kids, I can set it down and walk away. Can’t do that with backstrap weaving.
When choosing the thread, you will need a light color, a medium color, and a dark color. High contrast is important in this pattern!
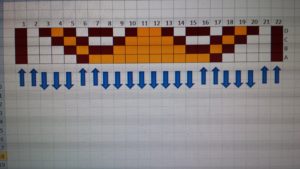
You will warp it up with the #1 card on the left; #22 card on the right, reading the pattern just like reading a book. The next thing to note is that, for this pattern, you should have the top surface of the cards facing *left*. If you have the cards facing right, the pattern will show up on the bottom side of the weaving. Also, and the pattern (above) has the rows lettered backwards–D, C, B, A. (If they were lettered A, B, C, D, you would have to face your cards to the right–good tip to note for when you find future patterns!)

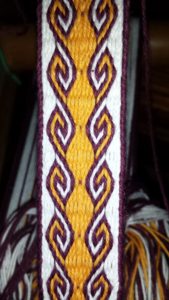
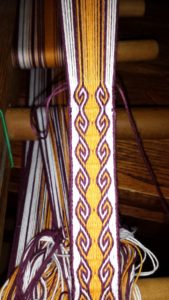
This is the pattern for the dreaded Ram’s Horn pattern. Some people dread it, but it’s really not that bad! I love this pattern and I’ve made a few pieces with this pattern and while it’s not from the Medieval period (for those SCA recreationists out there), it sure looks great and the technique of turning the cards is all the same from ancient times.

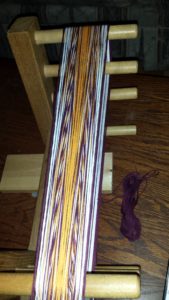
First, a note. I mark my cards. In this set, I’ve colored the AD side blue, and the BC side pink. This is the way I can tell when I’m back in the home position.
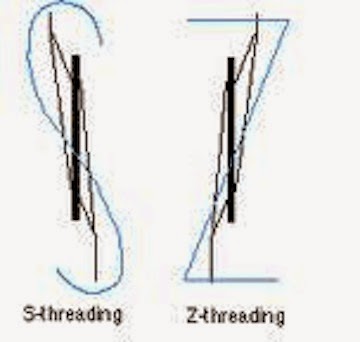
Just a refresher: Each column in the pattern is marked with S or Z. Some patterns will be marked with \ for S or / for Z, but since this font doesn’t have a significant slant, it can look a bit more confusing, so I’ve used the letters instead. Many new weavers get confused about how to do S and Z threading. This is one of the best diagrams I’ve found to remind yourself how the threads go through the cards.
[dooo-do-dooooo…deee-daaah-dee….]

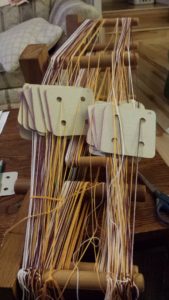
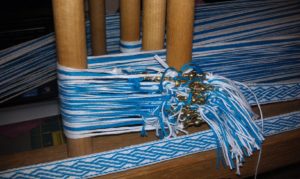
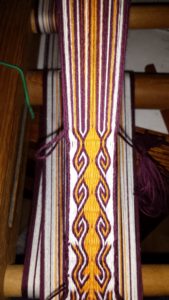
Then you can start splitting the deck! The cards now will turn in groups in opposite directions for four quarter-turns. First separate the cards into groups. Slide the cards 1 & 2 toward you, 3-5 away from you, 6 & 7 toward, 8-15 away, 16-17 toward, 18-20 away, 21-22 toward. See the picture above? That’s how it should look.
1. Turn all the cards four quarter-turns BACK, throwing the shuttle between each quarter turn. End in the home position.
2. Slide cards 1-2 back, 3-5 forward, 6-7 back, 8-15 forward, 16-17 back, 18-20 forward, 21-22 back. Turn cards 1/4 turn in opposite directions (forward cards forward; backward cards back). End in home position.
Repeat steps one and two to your heart’s content!
The observant weaver will note that since some of the threads are always turning back and the rest turn forward four and backward four, that some of the threads are going to build up a great twist in it. This will shorten the warp length for those threads, but not the rest, causing tension issues.
Some people have tried (with varying success) to use fishing spinners that will untwist the threads as you go. This is great if you’re doing backstrap weaving or have a long span that your warp is spread out, but I use this inkle loom and the twist builds up between the cards and the first or second peg and stops there. You *can* move the twist down the entire length, around each of the pegs to get the spinners to untwist, but it’s time-consuming and can be frustrating.
The other thing you can do is carefully untie the threads that are twisted, untwist them, and re-tie…this is also time-consuming and can be frustrating. I’ve done it…a couple times.
But the other option that works well with this pattern is to simply change directions to untwist every few repeats. You could do every couple of horns, six horns, eight horns…whatever you desire. The question is, at what point in the pattern do you change directions?
In this pattern you were repeating steps 1 and 2, now you have to take steps 3 and 4 to go the opposite direction!
3. Slide cards 1-2 forward, 3-5 back, 6-7 forward, 8-15 back, 16-17 forward, 18-20 back, 21-22 forward. Turn cards 1/4 turn in opposite directions (forward cards forward; backward cards back). End in home position.
4. Turn all cards for four quarter-turns forward. End in home position.
You will repeat this pair of steps until the twist builds up in the opposite direction. Then you’ll change directions again, finishing step 4, then going back to step 1 and 2.
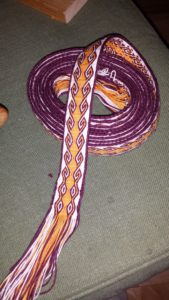
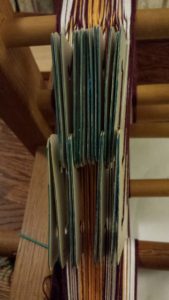
Now you can weave your Ram’s Horns and show your Advanced Card Weaving skills to all your friends!
Good luck!
Elewys of Finchingefeld, GdS, JdL
Barony of Aquaterra, Kingdom of An Tir